3 Garage Storage Solutions You Can DIY to Maximize Space
The garage often serves as a catch-all space for storing items, making it prone to clutter and disorganization. But with some creative thinking and effective garage storage solutions, you can transform it into an organized and functional space. In this short post, I’ll share three of my favorite garage storage ideas you can DIY to save money (and space).
Related: How To Increase Storage Space In Your Home Office
View this post on Instagram
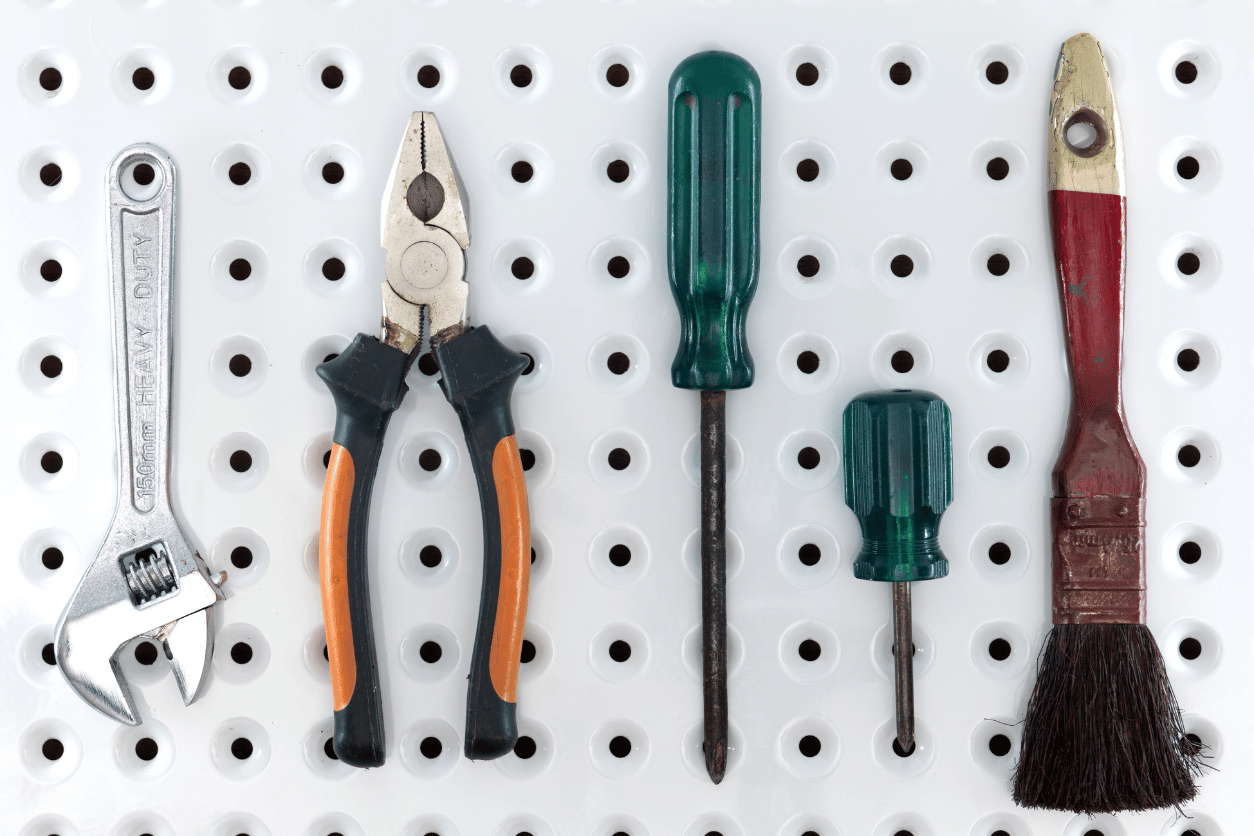
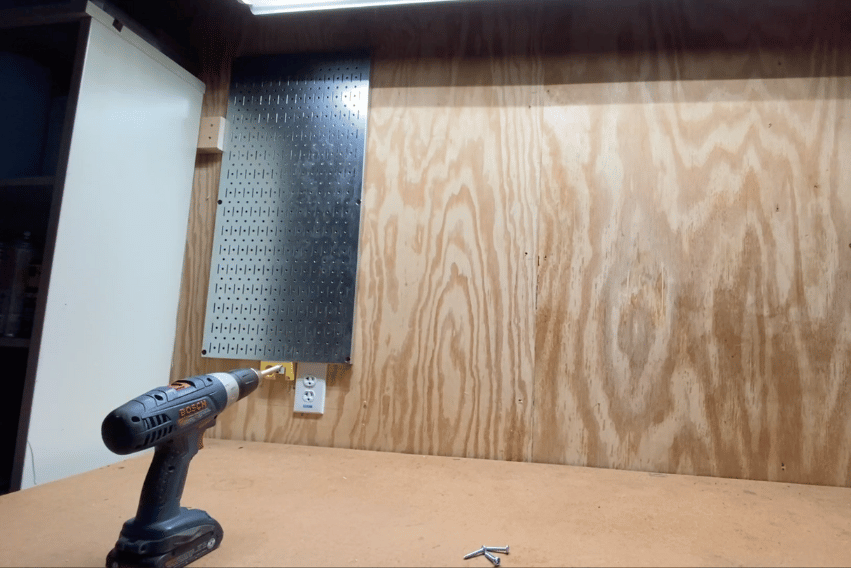
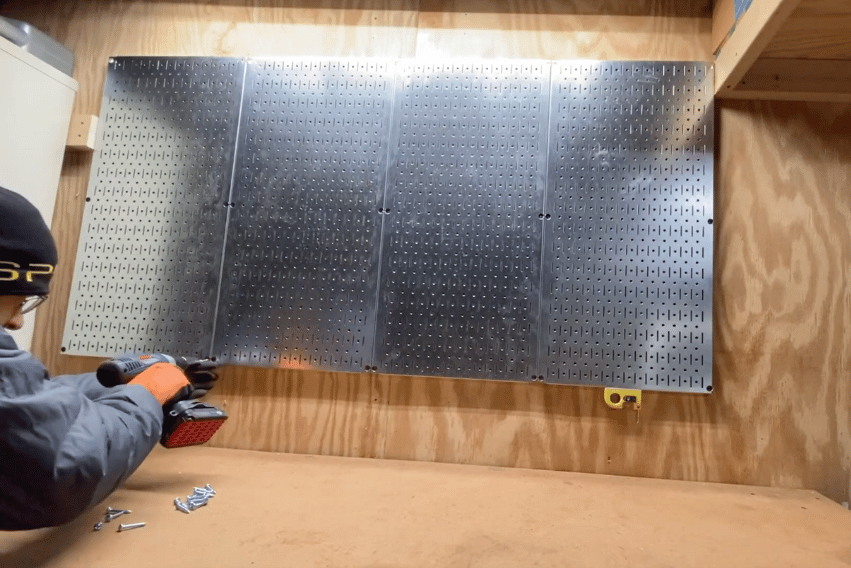
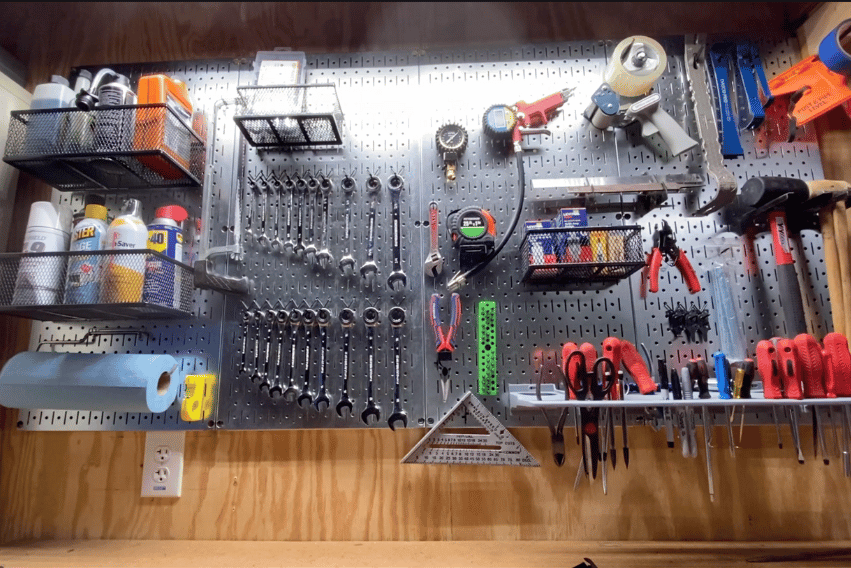
1. Wall-mounted pegboards
2. Overhead Rails for Storage Bins
An often overlooked area is the ceiling, which can be a fantastic garage storage solution if you know how to make the most of it. Overhead rails keep your storage bins accessible while saving much-needed ground space. Here’s how you can build and install these yourself.
Tools needed:
- Drill
- Star drive bit (typically comes with construction screws)
- Rafter Square
- Pencil
- Circular saw
- 5/64″ drill bit
- Tape measure
Materials Needed:
- One 4″ x 8″ Plywood
- Four two-by-three studs
- Twenty-eight 1.25″ construction screws
- Six 2.5″ construction screws
- Wood Glue
For this project, you’ll need some sturdy plywood, a few two-by-threes, screws, and wood glue. Before you get to cutting, make sure to plan the space you’re working with. Measure your garage ceiling to determine how long your rails need to be and how many storage bins you want to accommodate.
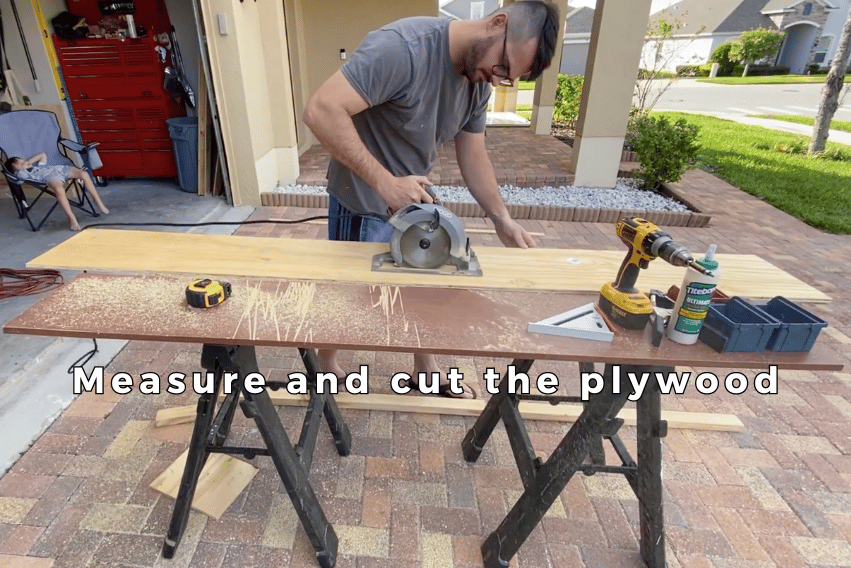
Keep in mind the need to leave some space at the ends of each rail for easy access to the bins. Once you have a plan in place, it’s time to start cutting your wood to size.
You’ll need to cut the plywood into strips that will serve as the top and bottom of your rails. I recommend cutting these into strips about 4 inches and 5 1/2 inches wide, depending on how many bins you want to store and the available space.
Your two-by-threes will be cut to the same length as your plywood strips and will serve as the supports for the bins. When you’ve finished cutting, you should have several pieces ready to be assembled into your storage rails.
Time for Assembly
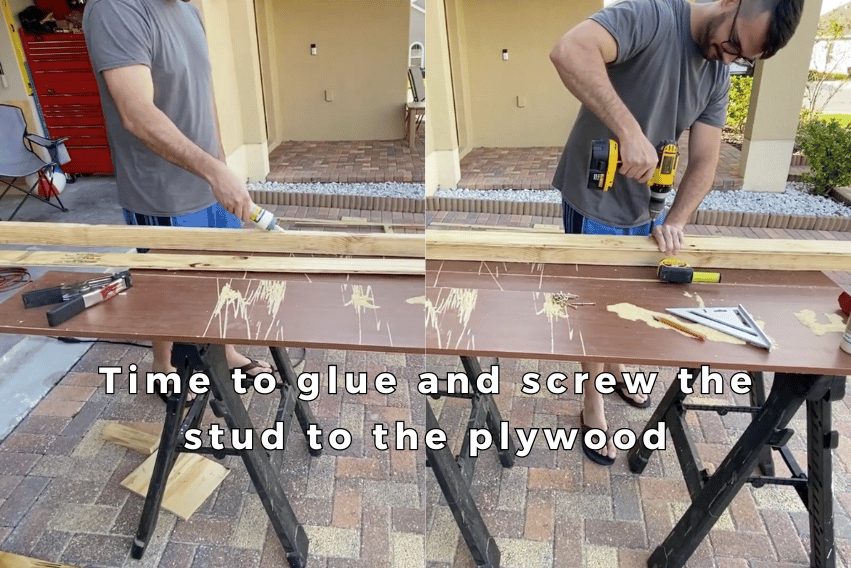
Assembling the rails is where things start to come together. Take one of your plywood strips and place it flat on your work surface. Then, lay a 2×3 on top, centered along the strip. Use wood glue to secure the two-by-three in place, making sure it’s centered and straight.
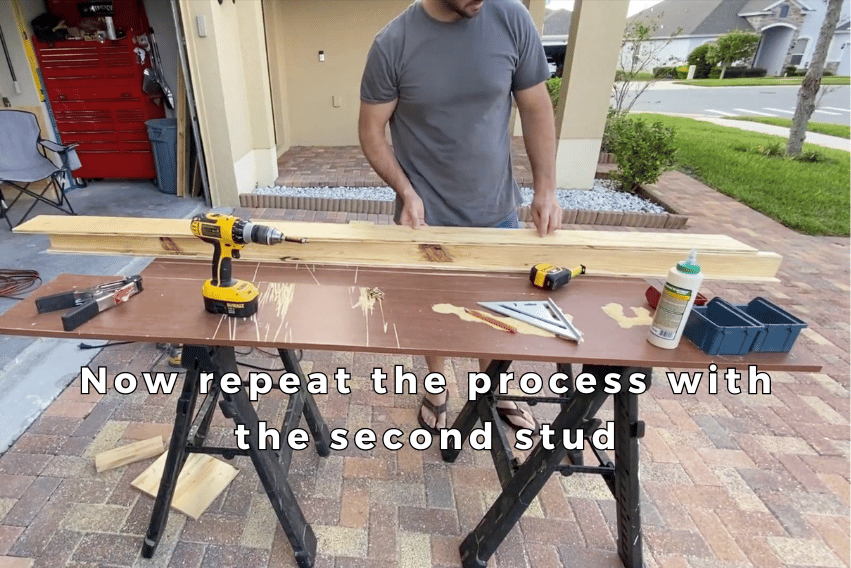
Drill pilot holes through the plywood and into the two-by-three every 7 inches to prevent the wood from splitting. Use screws to secure the two pieces together. Once you have the first support in place, repeat the process on the opposite side with the second plywood strip. The result should be a sturdy rail capable of holding your storage bins securely.
With the rails assembled, it’s time to install them on the ceiling. You’ll want to secure the rails to the ceiling joists to ensure they can support the weight of your storage bins. Use a stud finder to locate the joists, and mark where you’ll be drilling. Carefully lift the rail into position, using a helper if needed, and drill pilot holes through the rail and into the joists.
Secure the rail in place with screws, checking to make sure it’s level. Once all the rails are mounted, you’re ready to slide your storage bins into place.
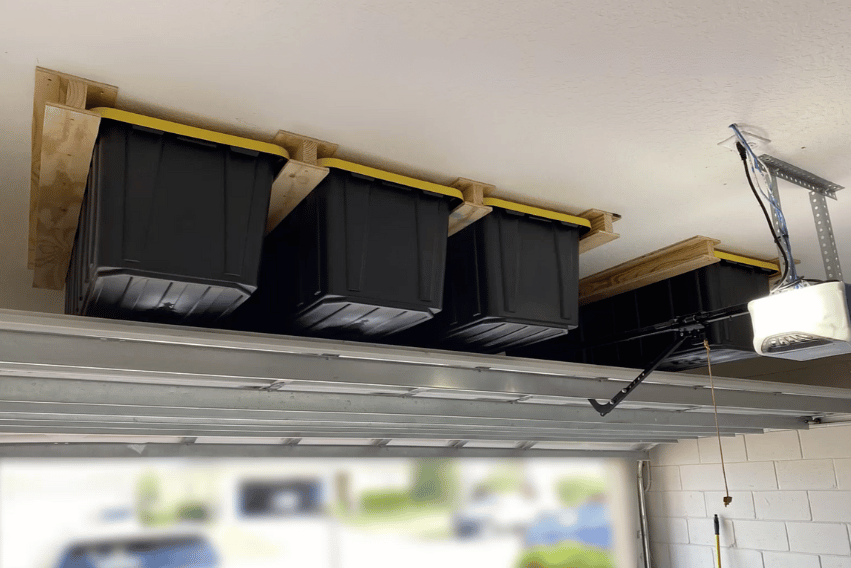
Not only does this free up valuable floor space, but it also keeps your belongings organized and easily accessible whenever you need them.
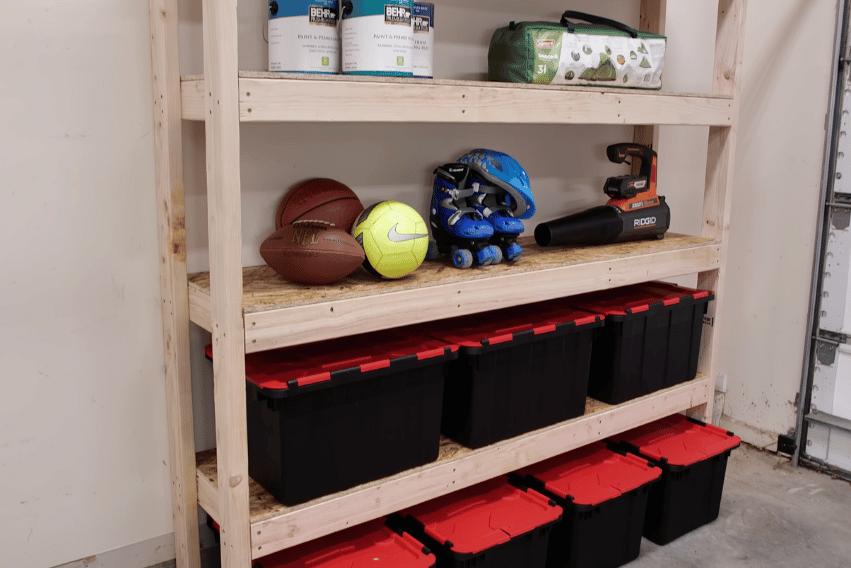
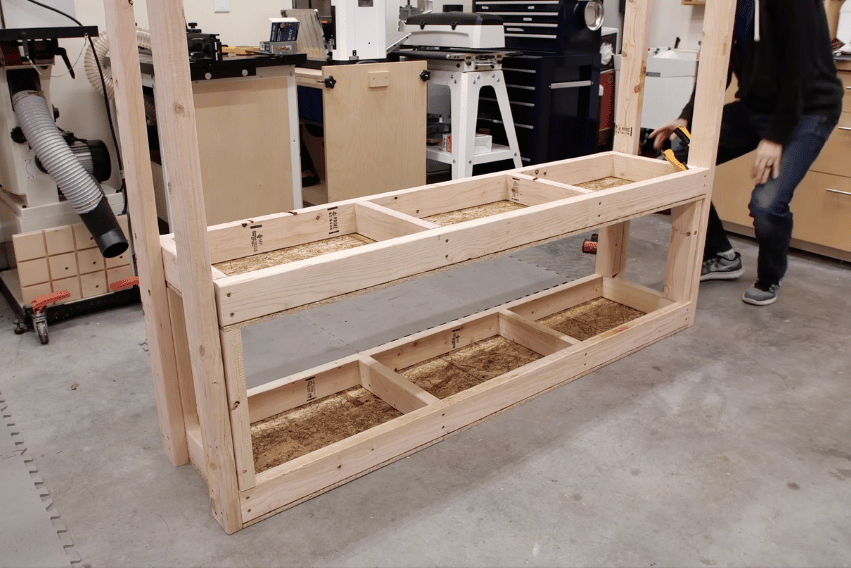
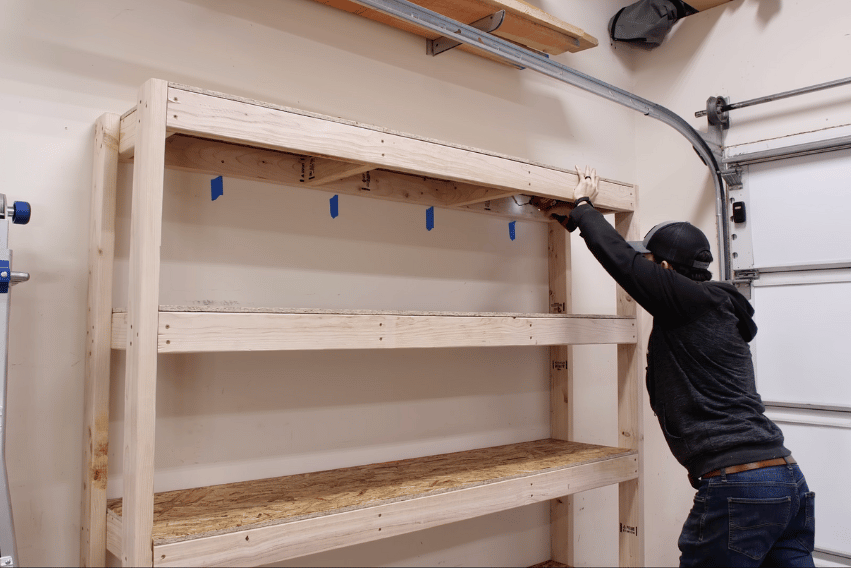
3. Wooden Shelves
Tools Needed:
- Circular saw
- Drill
- Drill bits
- Wood screws
- Tape measure
- Level
- Square
- Clamps
- Wood glue
- Safety gear
- Pencil
- Sandpaper or sanding block
Materials Needed:
- Two-by-fours: 8 pieces, 6 feet long (or the horizontal shelf supports), 4 pieces, 75.5 inches long (for the vertical legs on one side), 4 pieces, 76 inches long (for the vertical legs on the opposite side to account for the garage floor slope)
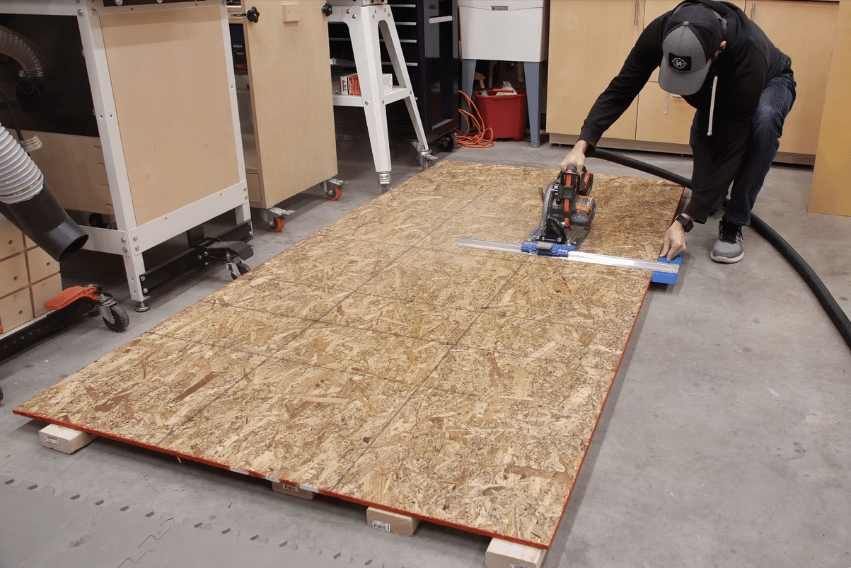
- 1 plywood sheet of 7/16 inch oriented strand board (OSB): This can be cut into three strips, each 16 inches wide and 8 feet long, which will then be cut down to 69 inches long to fit the shelf frames
- 13 pieces, 13 inches long bracing: These will connect the two-by-fours and provide stability to each shelf
Let’s Start Building!
If you’re looking to reclaim some of that precious floor space in your garage, installing DIY wooden shelves is a smart and affordable solution. Not only do they offer a dedicated place for your items, but they can also be customized to fit the specific dimensions and storage needs of your garage.

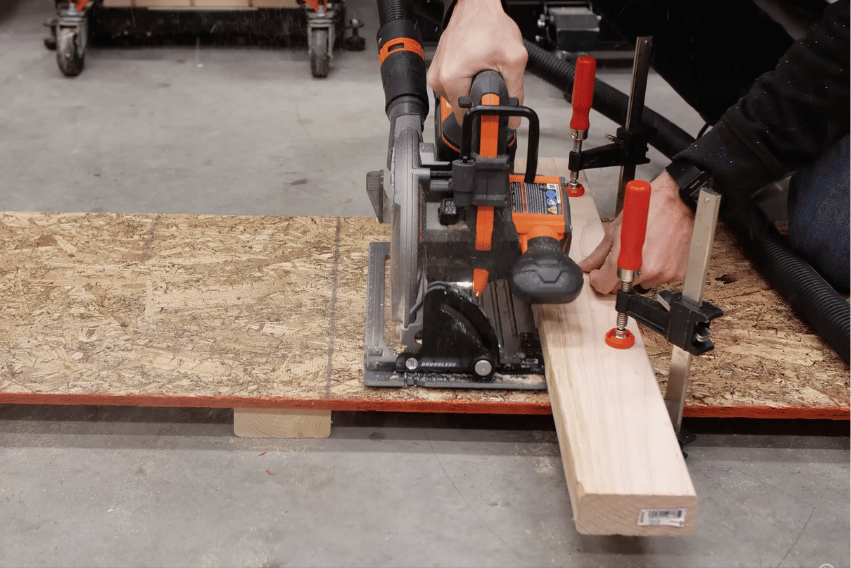
Begin by cutting your two-by-fours into the appropriate lengths for the frame and legs. Typically, you’ll want each shelf to be around 16 to 20 inches deep, but you can adjust this based on the space available in your garage.
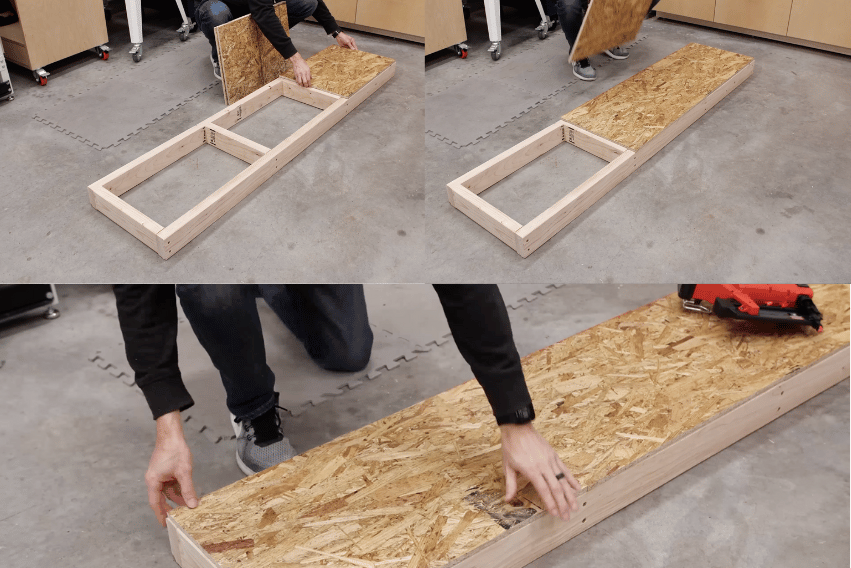
Once your pieces are cut, it’s time to start assembling the shelves. Lay two of the two-by-fours parallel to each other and connect them with shorter crosspieces to form a rectangular frame. Secure these with wood glue and screws, ensuring everything is square and sturdy. Repeat this process for each shelf you’re planning to install.
With the frames assembled, attach the plywood surfaces. Cut the plywood to match the dimensions of each frame, then secure it in place with screws. It’s a good idea to countersink the screws to create a flush surface and prevent any sharp edges from sticking out.

If you want to give the shelves a more polished look, you can sand the edges and apply a finish or paint that complements your garage’s aesthetic.
For added stability, you can add diagonal bracing at the corners of each shelf frame. This will help prevent any wobbling or sagging once the shelves are in use.
Finally, it’s time to install the shelves in your garage. Start by determining the height at which you want each shelf to be placed, making sure there’s adequate space between them for the items you plan to store.
Use a level to ensure each shelf is perfectly horizontal, then attach the shelves to the wall studs with heavy-duty screws.
Decades of Combined Expertise
Best Buy Guidebook is a culmination of online publishing lessons learned. From SEO to paid ads, our team has experienced the highest of highs and the lowest of lows. Our goal now is simple: Arm readers with the most information possible.