How To Hang Christmas Lights on Your Roofline
Your no-fuss guide to installing Christmas lights on your roofline—because nothing says ‘season’s greetings’ like a twinkling rooftop.
There’s something magical about the first crisp evening when homes start to glow with Christmas lights. It’s like the whole neighborhood comes alive, each house twinkling with its own personality. I’ll admit, I’ve always been a little envious of those perfectly lit rooflines—each bulb spaced just right, glowing brightly against the winter sky. But the idea of doing it myself is intimidating, to say the least.
That is, until a few years ago, when I finally decided to give it a shot. Armed with more enthusiasm than skill (and a slightly wobbly ladder), I discovered that installing Christmas lights on a roofline isn’t just doable—it can even be enjoyable, especially when you know what to expect. It’s about more than just hanging lights; it’s about the little victories, like getting that one stubborn clip to stay in place or stepping back to see your house shine for the first time.
Related: When Should You Start Decorating for Christmas?
This guide is for anyone who’s ready to take their holiday decorating up a notch—literally. We’ll cover everything you need to know to install Christmas lights on your roofline, from tools and safety tips to the tricks that make all the difference. Whether you’re aiming for a cozy glow or a Clark Griswold-level display, you’ll be ready to light up your home and maybe even your block.
Step 1: Plan Your Layout
Before climbing onto your roof, map out your light placement. Decide whether you’ll outline just the roofline or include additional features like windows and doors. Measure the length of the areas you’ll be lighting and ensure you have enough materials. For most homes, C9 bulbs spaced 12 inches apart work beautifully, striking a balance between brightness and budget.
If you want a truly seamless look, opt for bulk light lines with retrofit bulbs. These allow you to cut the line to your exact measurements and eliminate any awkward excess.
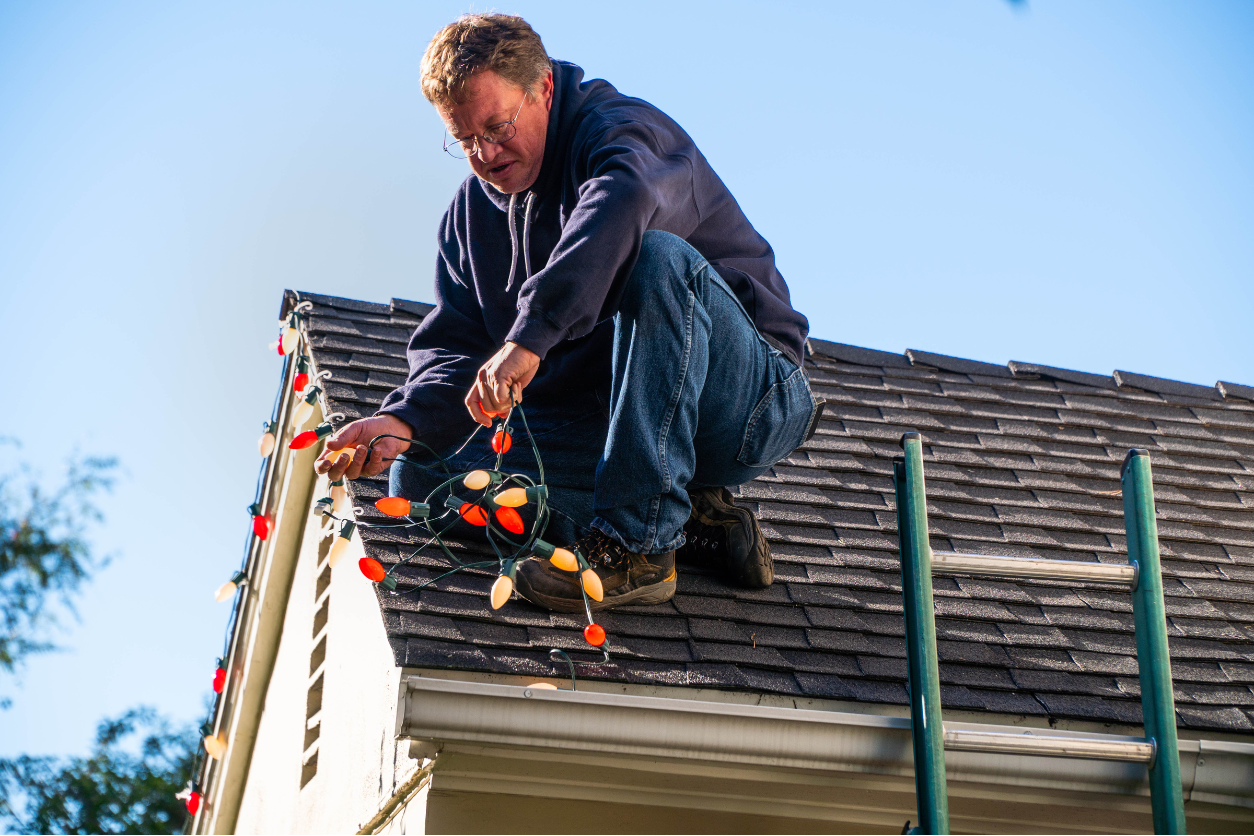
Step 2: Prioritize Safety
Nothing dampens holiday cheer like an accident. Use a sturdy ladder, and make sure you’re working on stable ground. If you’re uncomfortable with heights or unsure of your footing, ask for help or consider hiring a professional for particularly tricky sections. Never install lights during bad weather—wet roofs and ladders don’t mix.
Step 3: Prepare Your Light Line
Using bulk light lines ensures you get a custom fit, but it also means assembling the line yourself. Here’s how:
- Attach your male and female plugs. Identify the ribbed side of the zip cord, which corresponds to the neutral wire. Align this with the wider blade on the plug to ensure correct polarity
- Add bulbs to each socket. It’s helpful to test the bulbs before installation to avoid surprises
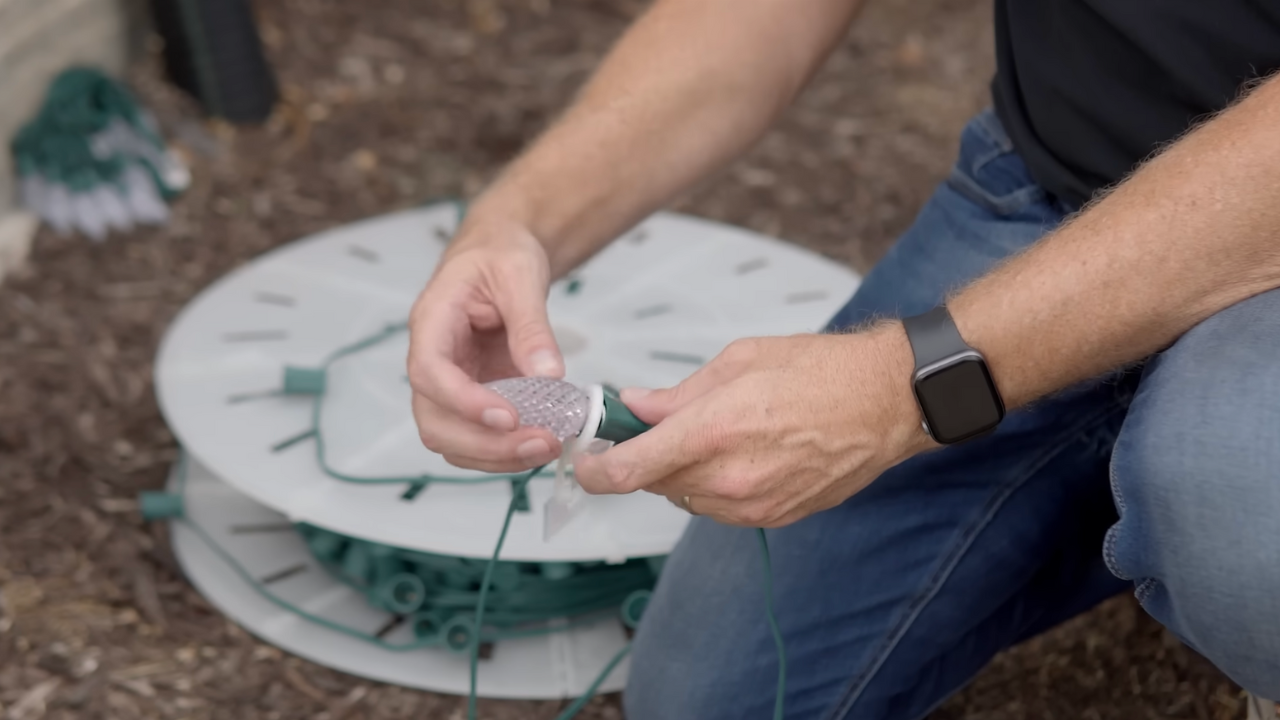
When choosing bulbs, professional-grade options like Pro Christmas or Minleon are worth the investment. They offer better brightness and durability compared to cheaper alternatives from big-box stores.
Step 4: Secure the Christmas Lights with Clips
Light clips are essential for keeping your installation neat and secure. Flex clips are a popular choice because they stay attached to the sockets, simplifying both installation and takedown.
- Gutter Installation: Attach the clip to the gutter lip and slide the socket into place
- Shingle Installation: Secure the clip under the shingle edge, ensuring the bulb stays upright
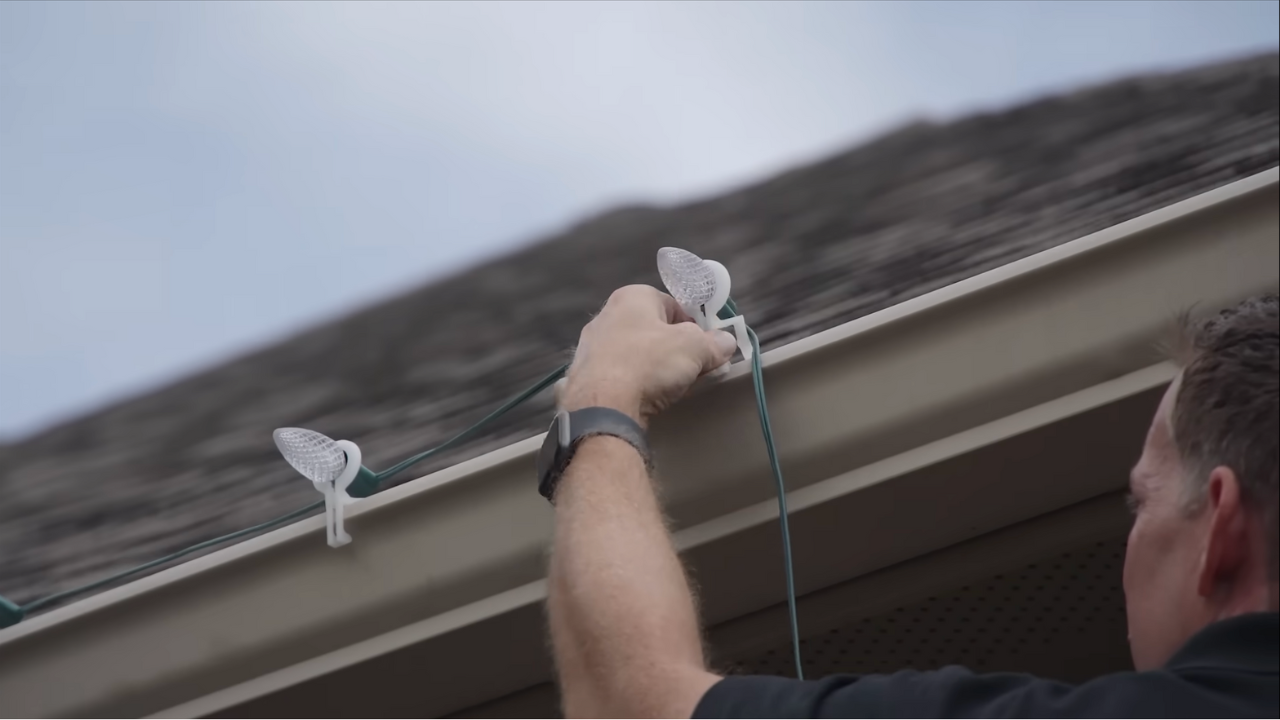
Don’t worry if your bulb orientation changes between gutters and shingles—it won’t affect the overall appearance at night.
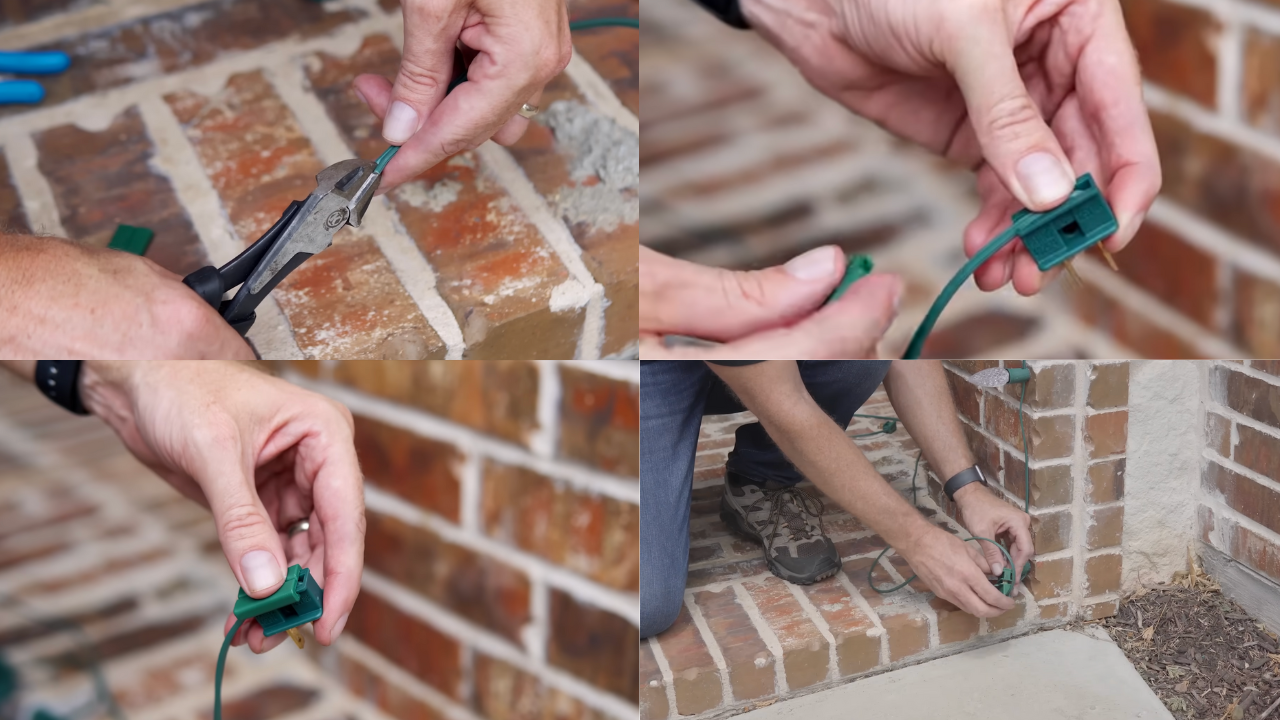
Step 5: Transition Between Roof Levels
Many homes have rooflines at varying heights. When transitioning between levels:
- Avoid cutting the light line unnecessarily. Each new connection adds a potential failure point.
- If needed, use electrical tape to seal unused sockets or cap them with socket covers to prevent moisture issues.
For a cleaner look, you can remove sockets entirely by tapping them off with a mallet and sealing the remaining holes.
Step 6: Manage Power Sources
The power source is crucial for a successful installation. Ideally, use a single outlet to avoid uneven timing across sections of your lights.
- Run a zip cord from your outlet to the starting point of your light line.
- Use a timer to automate on-and-off cycles, saving energy and eliminating the hassle of manual operation.
If your display exceeds 250 bulbs or 250 feet of light line, split the load across multiple circuits to prevent overloading.
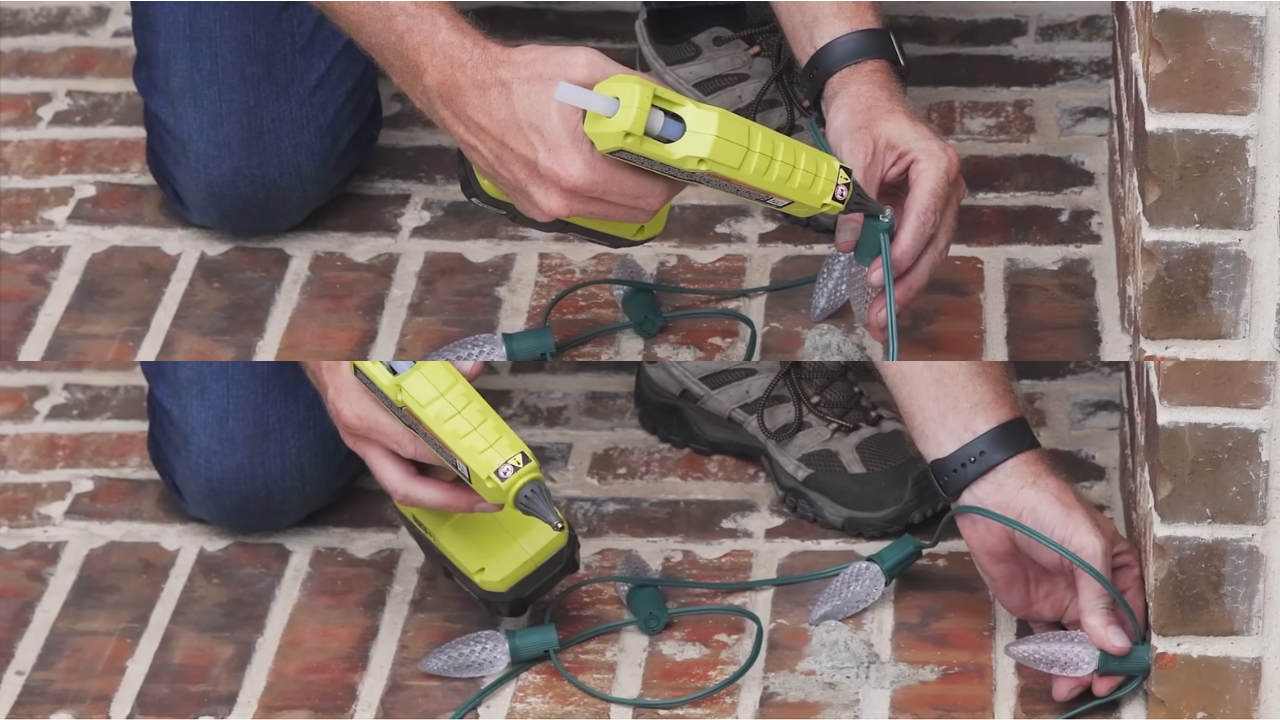
Step 7: Attach Christmas Lights to Non-Gutter Areas
For areas like brick arches or stone facades, hot glue can be a lifesaver. Apply a small amount of glue to the base of the socket, press it onto the surface, and hold for a few seconds until it sets. Avoid using hot glue on painted or stucco surfaces, as it can cause damage.
Step 8: Fine-Tune the Aesthetics
One of the secrets to a professional-looking display is attention to detail. When approaching peaks, ensure a bulb is positioned at the exact center for symmetry. Similarly, adjust spacing along the roofline to maintain consistent alignment.
Step 9: Test Your Setup
Once everything is in place, plug in your lights and step back to admire your work. Look for any gaps, flickering bulbs, or misaligned sections. It’s easier to make adjustments now than to climb back up after the holiday rush begins.
Step 10: Store Christmas Lights for Reuse
When the season ends, store your lights carefully to make next year’s installation easier. Leave clips attached to the light line if you used flex clips, and coil the line neatly to avoid tangling.
Decades of Combined Expertise
Best Buy Guidebook is a culmination of online publishing lessons learned. From SEO to paid ads, our team has experienced the highest of highs and the lowest of lows. Our goal now is simple: Arm readers with the most information possible.