How to Connect Printer to Wi-Fi in 3 Easy Steps
The convenience of having a wireless printer is unbeatable. Whether you’re printing from your phone, laptop, or tablet, it just makes life a little easier. So, figuring out how to connect printer to Wi-Fi without the usual frustration is worth the effort. Before you start, it’s helpful to know that every printer brand might have slight variations. Regardless of the brand, the basic principles are the same. You’ll need your Wi-Fi network name and password handy, and sometimes, the process depends on whether your printer has a screen for input.
How to Connect Printer to Wi-Fi Using WPS
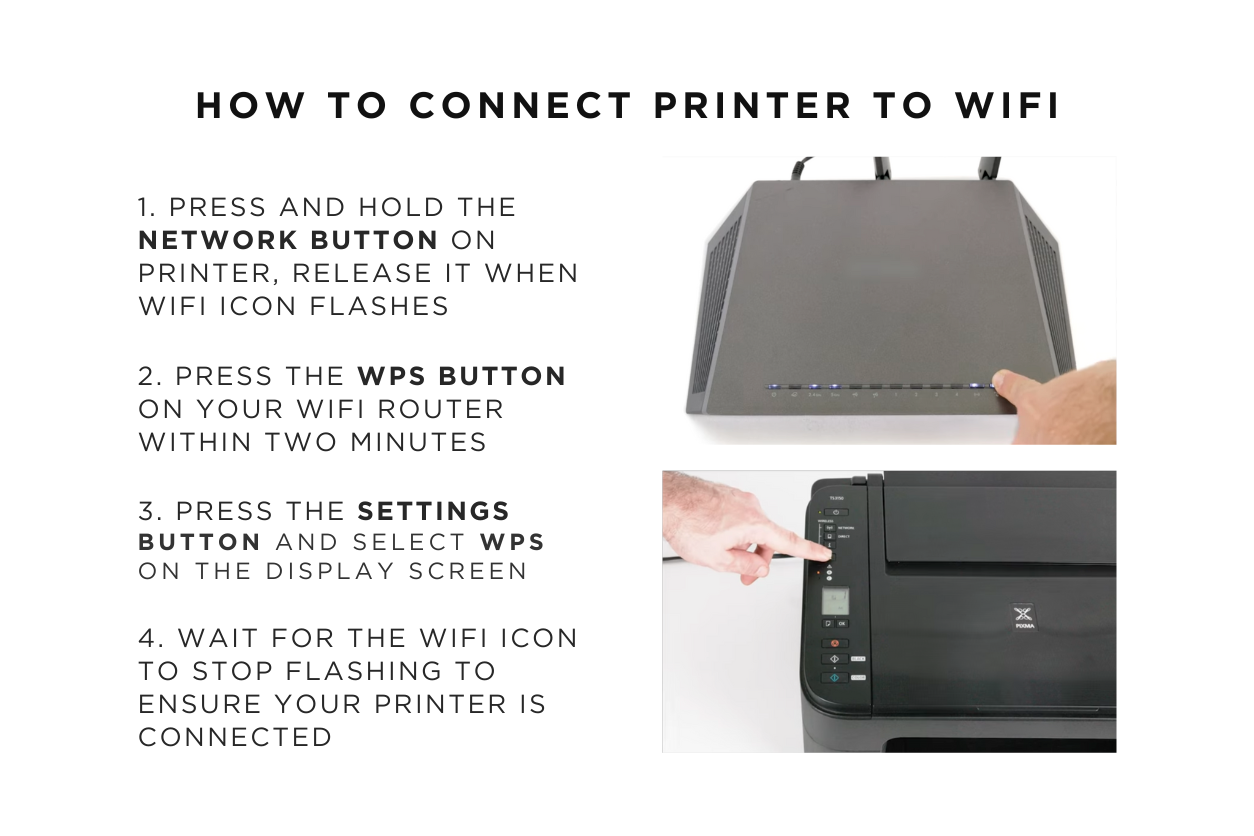
WPS (Wi-Fi Protected Setup) is one of the easiest methods for connecting a printer to your Wi-Fi network. It’s quick, doesn’t require entering any passwords, and works if both your printer and router support it. To get started, make sure your printer is powered on and near your router.
First press the network settings icon on your printer until the Wi-Fi light starts flashing. Now press the WPS button on your router (make sure you do it within 2 minutes or you’ll have to start all over). The location varies depending on the router model, but it’s usually labeled clearly, often on the side or back.
Once the WPS button is pressed, you’ll have about two minutes to initiate the connection from your printer. On most printers, you can find the WPS option by navigating through the wireless settings on the printer’s display screen. Select WPS, and the printer will automatically search for your network and connect.
You’ll know the connection is successful when the Wi-Fi indicator light on the printer stops blinking and stays solid. This method saves you from typing in the network name and password manually, which is a huge time-saver, especially if your printer’s interface isn’t the most user-friendly.
Manually Connecting to Wi-Fi on a Printer with a Display Screen
If your printer doesn’t support WPS, or you prefer to connect manually, the process is still relatively simple. The first thing you’ll want to do is navigate to the wireless settings menu on your printer’s display screen. Look for the option labeled “Wireless Setup Wizard” or something similar.
Once you’ve selected the wireless setup option, your printer will begin searching for nearby Wi-Fi networks. Find your network in the list, select it, and then enter your Wi-Fi password. This part can be a bit tedious if your printer doesn’t have a keyboard, as you’ll need to use the directional arrows to input each character.
After you’ve entered the correct password, the printer will attempt to connect. If all goes well, the connection will be established, and the Wi-Fi indicator light will go solid, just like with the WPS method.
Connecting Printer to Wi-Fi Without a Display Screen
Printers without display screens require a slightly different approach. For these printers, you’ll need to connect to Wi-Fi using the printer software on your computer. Start by installing the printer’s driver software, either from the included CD or the manufacturer’s website. Once installed, open the software, and follow the on-screen prompts to connect your printer to Wi-Fi.
The software will guide you through selecting your Wi-Fi network and entering the password. During this process, your printer might need to be temporarily connected to your computer with a USB cable. Once the setup is complete, you can remove the USB cable, and the printer will remain connected to your Wi-Fi network. This method is a little more hands-on, but it works reliably for printers that don’t have their own screens.
How to Connect Printer to Wi-Fi on Windows
Connecting a printer to Wi-Fi on Windows is straightforward if your printer is already set up on the network. First, make sure your printer is powered on and connected to Wi-Fi. Then, go to your Windows settings by clicking the Start menu and selecting “Settings.”
From the settings menu, choose “Devices,” followed by “Printers & scanners.” Here, you’ll see an option to “Add a printer or scanner.” Click this, and Windows will begin searching for available printers on your network. Once it finds your printer, select it, and Windows will complete the installation.
If Windows can’t find your printer automatically, you might need to manually enter your printer’s IP address. You can usually find this in your printer’s settings menu or user manual.
How to Connect Printer to Wi-Fi on Mac
For Mac users, the process is a bit different but equally simple. Start by making sure your printer is powered on and connected to Wi-Fi. On your Mac, open “System Preferences” from the Apple menu and select “Printers & Scanners.”
Click the “+” button to add a new printer. Your Mac will automatically search for printers on your Wi-Fi network. When it finds your printer, select it from the list, and the installation will complete. If your printer doesn’t appear, you might need to install the printer driver manually, which you can find on the manufacturer’s website.
Related: What Is an Inkless Printer And How Does It Work?
Troubleshooting Wi-Fi Printer Connection Issues
If your printer isn’t connecting to Wi-Fi, there are a few things you can try. First, make sure your printer is close enough to your Wi-Fi router. Distance can sometimes interfere with the connection, especially if your Wi-Fi signal isn’t strong.
Another common issue is that some printers can only connect to the 2.4GHz Wi-Fi band. Many modern routers have both 2.4GHz and 5GHz bands, so check that your printer is trying to connect to the correct one. You can usually adjust this in your router settings.
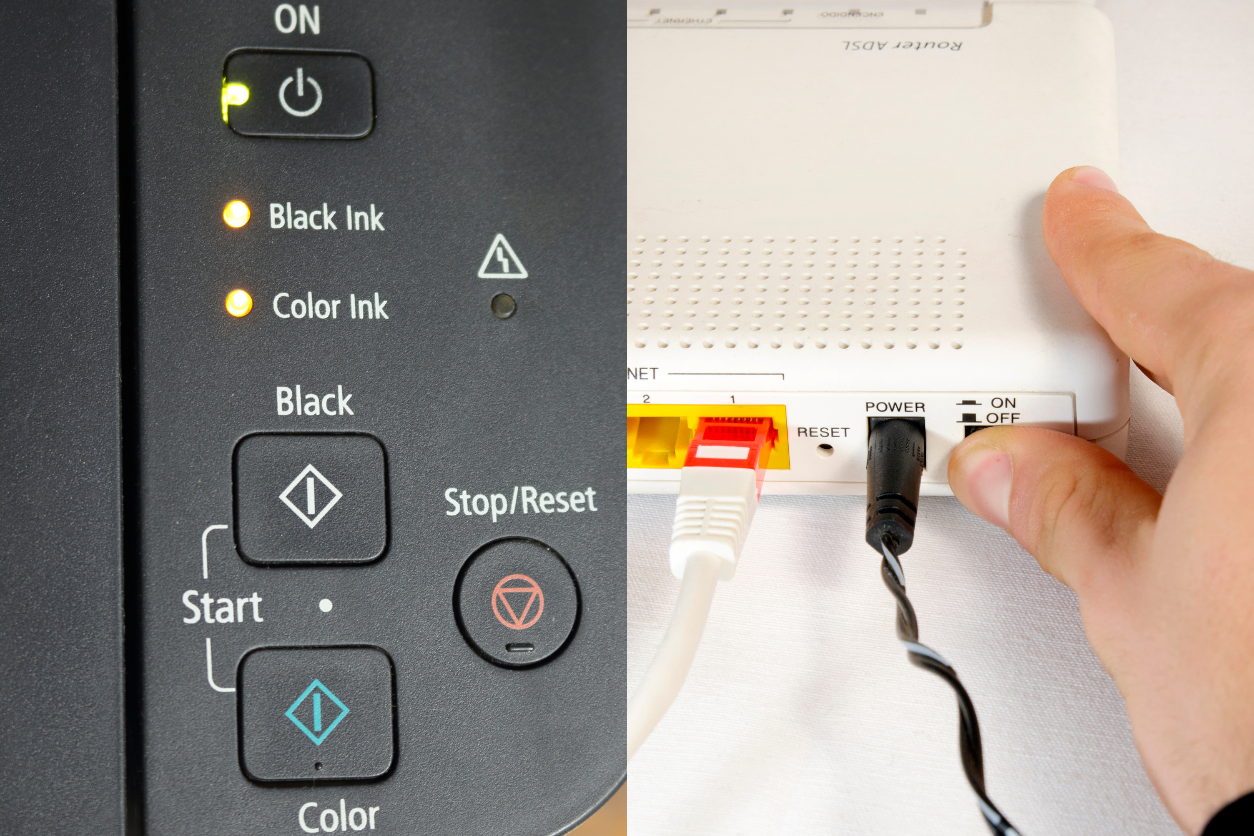
If all else fails, restarting your router and printer can often resolve connection issues. Turn both devices off, wait a minute, then turn them back on. This refreshes the network connection and can solve a range of problems.
Decades of Combined Expertise
Best Buy Guidebook is a culmination of online publishing lessons learned. From SEO to paid ads, our team has experienced the highest of highs and the lowest of lows. Our goal now is simple: Arm readers with the most information possible.