7 Most Effective Methods for Removing Rust From Tools
Rust has a way of creeping up on just about anything made of metal—tools, furniture, even that old bike sitting in the corner of your garage. At first, it’s just a little discoloration, something you might ignore. But left unchecked, it spreads, eating away at the metal and weakening it over time. We’ve all had something fall victim to rust, whether it’s your favorite pair of garden shears or outdoor patio furniture that once looked pristine. The good news is that rust isn’t a death sentence for your metal items. There are practical ways to remove it that fit different levels of rust damage and different materials. From quick fixes using everyday household items to more serious methods like sandblasting for the tougher jobs, I’ve seen it all. Having dealt with plenty of rusted-out tools and equipment myself, I can tell you the trick is knowing which method to use for which job. Stick around, and I’ll show you how to get rid of the rust and make your items look (and work) like new again.
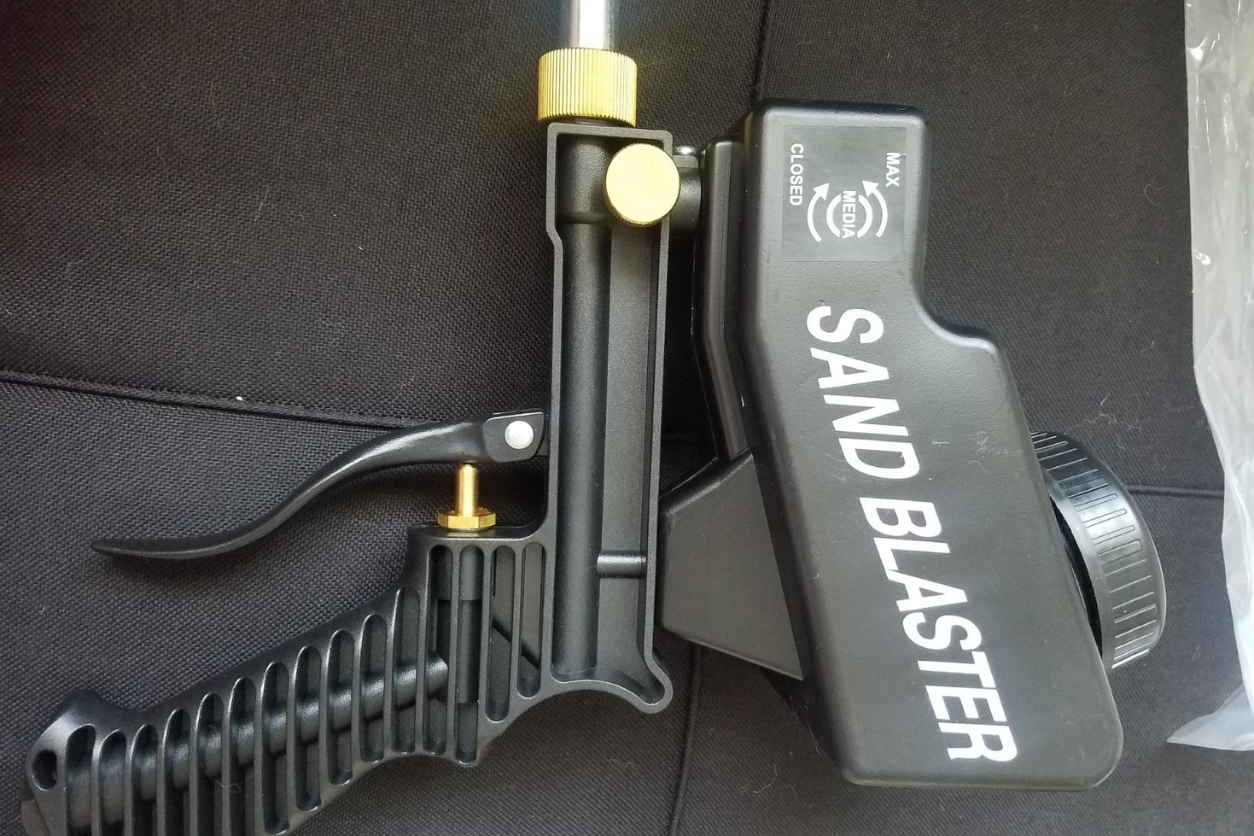
Sandblasting
Cost of Sandblasting kit: $50-$70
When you’re dealing with rust that covers a large surface—like outdoor furniture, metal fencing, or even car parts—manual scrubbing or using chemical solutions can feel like a losing battle. Sandblasting is an efficient and highly effective method that involves using compressed air to blast an abrasive material (often sand) at the rusted surface, stripping away rust and old paint and leaving the metal beneath ready for priming and painting. But sandblasting isn’t a casual DIY activity—it requires careful preparation and attention to detail to ensure safety and effectiveness.
Step 1: Safety Preparation
Before you even think about starting, safety is your top priority. Sandblasting produces a lot of fine dust and debris, which can be harmful if inhaled or if it comes into contact with your eyes or skin.
At a minimum, you’ll need a high-quality respirator, heavy-duty gloves, safety goggles, and full-body protective clothing.
Sandblasting is messy, and you don’t want to be in an enclosed space with all that dust and grit floating around. If you’re working indoors, make sure there’s good ventilation or, better yet, use an outdoor workspace.
Step 2: Choose the Right Abrasive Material
While sand is the traditional material for sandblasting, other media can be used depending on the surface you’re working with and how delicate it is.
- Sand: Ideal for tough jobs like removing rust from metal surfaces. It’s aggressive enough to handle significant corrosion.
- Glass beads or walnut shells: If the surface you’re working with is more delicate, you might want to choose a softer abrasive like these to avoid causing damage.
Step 3: Prepare the Surface
Make sure the surface is clean from debris and loosely attached rust. While sandblasting will remove most imperfections, giving it a quick brush beforehand will help the process go more smoothly.
Make sure there’s nothing nearby that could be damaged by stray particles. Cover any nearby objects or surfaces that aren’t being treated.
If the metal has oils or grease on it, you’ll want to degrease the surface before sandblasting to prevent the abrasive material from sticking and creating a mess.
Step 4: Set Up the Sandblaster
Once you’re ready, it’s time to load your sandblasting machine.
Load the abrasive material into the hopper of the machine, ensuring you’re using the right type for your job.
Depending on the surface and the amount of rust, you’ll need to adjust the pressure settings on your sandblaster. Higher pressure works better for heavily rusted areas, but it can be too aggressive for softer metals.
Do a quick test blast on a small, inconspicuous area to check your settings. Adjust the pressure if necessary.
Step 5: Start Sandblasting
Begin with slow, controlled passes. Sandblasting is about consistency rather than brute force.
Instead of blasting directly at the surface, hold the nozzle at a 45-degree angle. This helps the abrasive material strip the rust more effectively while reducing the risk of gouging the metal.
Avoid staying in one spot for too long. Doing so can wear away the underlying material or create uneven surfaces. Move in steady, sweeping motions across the surface to ensure an even clean.
Step 6: Inspect and Adjust
After you’ve done a few passes, stop and inspect your work.
If there are stubborn patches, you may need to adjust your pressure settings or make additional passes with the blaster.
If the sandblasting material starts to lose its effectiveness, you might need to refill the hopper with fresh material to maintain efficiency.
Step 7: Post-Blasting Cleanup
Once the rust is completely removed, you’ll need to clean the surface to get rid of any remaining debris.
Use compressed air to remove dust and leftover abrasive from the surface.
A clean, lint-free cloth can be used to wipe down the surface before applying any protective coating or paint.
Bare metal exposed after sandblasting can quickly rust again if left unprotected. Be sure to apply a rust-inhibiting primer or paint as soon as possible after the blasting process to prevent new rust from forming.
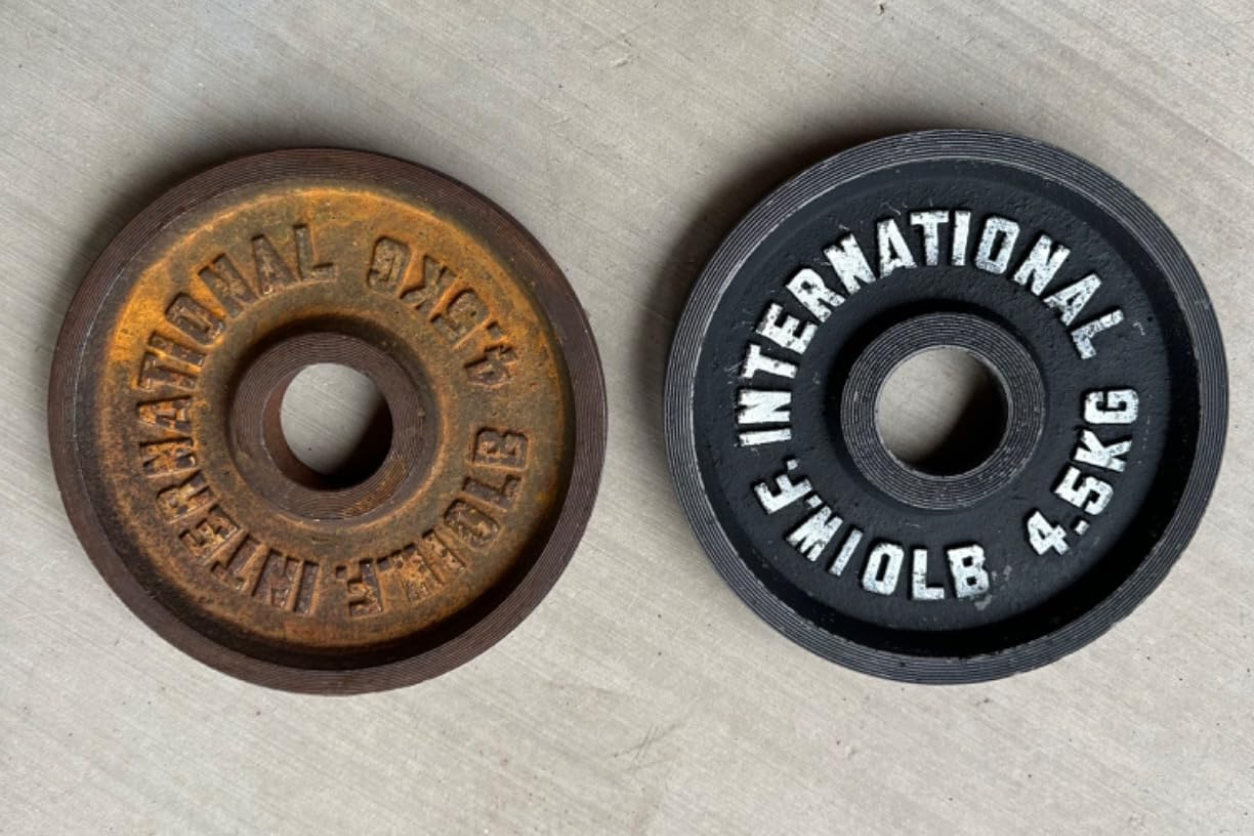
White Vinegar
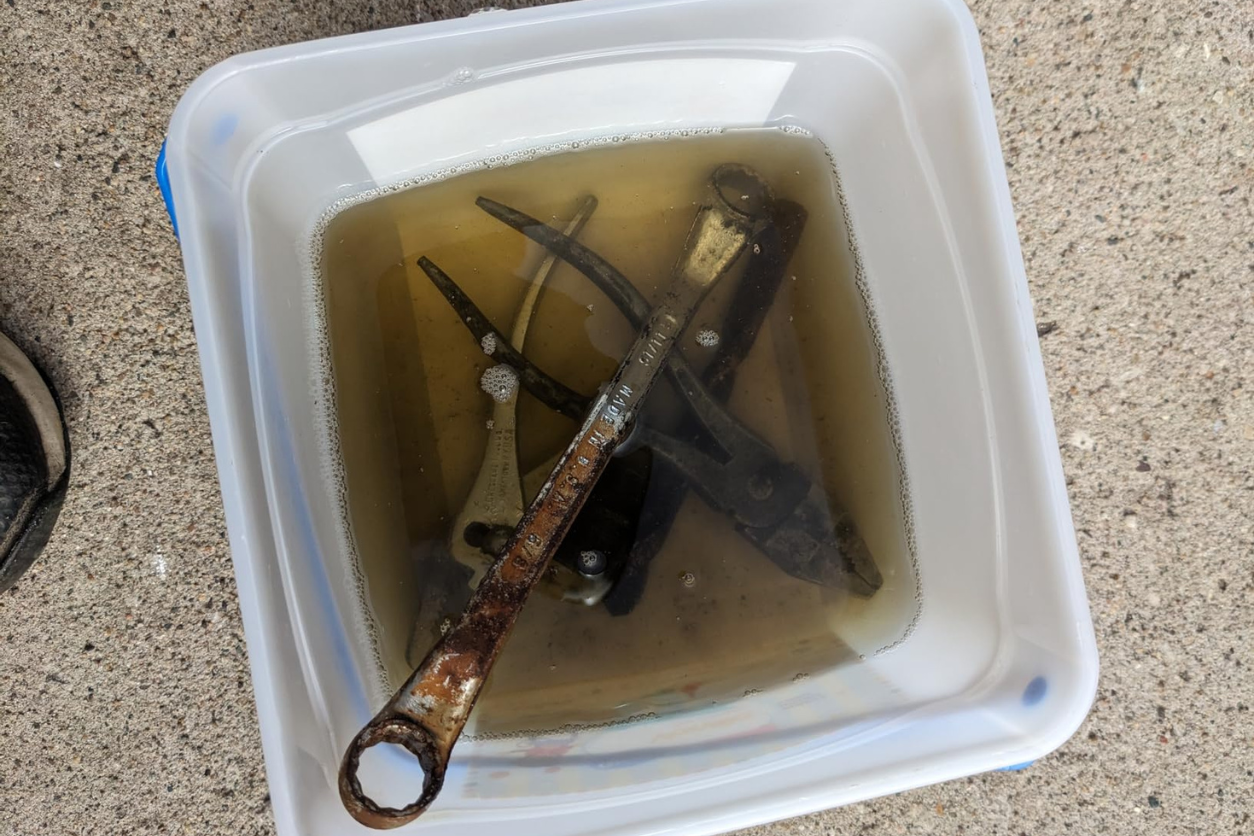
White vinegar is a surprisingly effective rust remover, especially for smaller metal items like tools, nuts, bolts, or even jewelry. It’s one of those household products that everyone seems to have, but many don’t realize just how useful it can be for rust removal. Its high acidity helps break down rust and corrosion, leaving your items looking fresh without the need for harsh chemicals or intensive scrubbing. Let’s walk through the process of how to use white vinegar to remove rust and when it’s most effective.
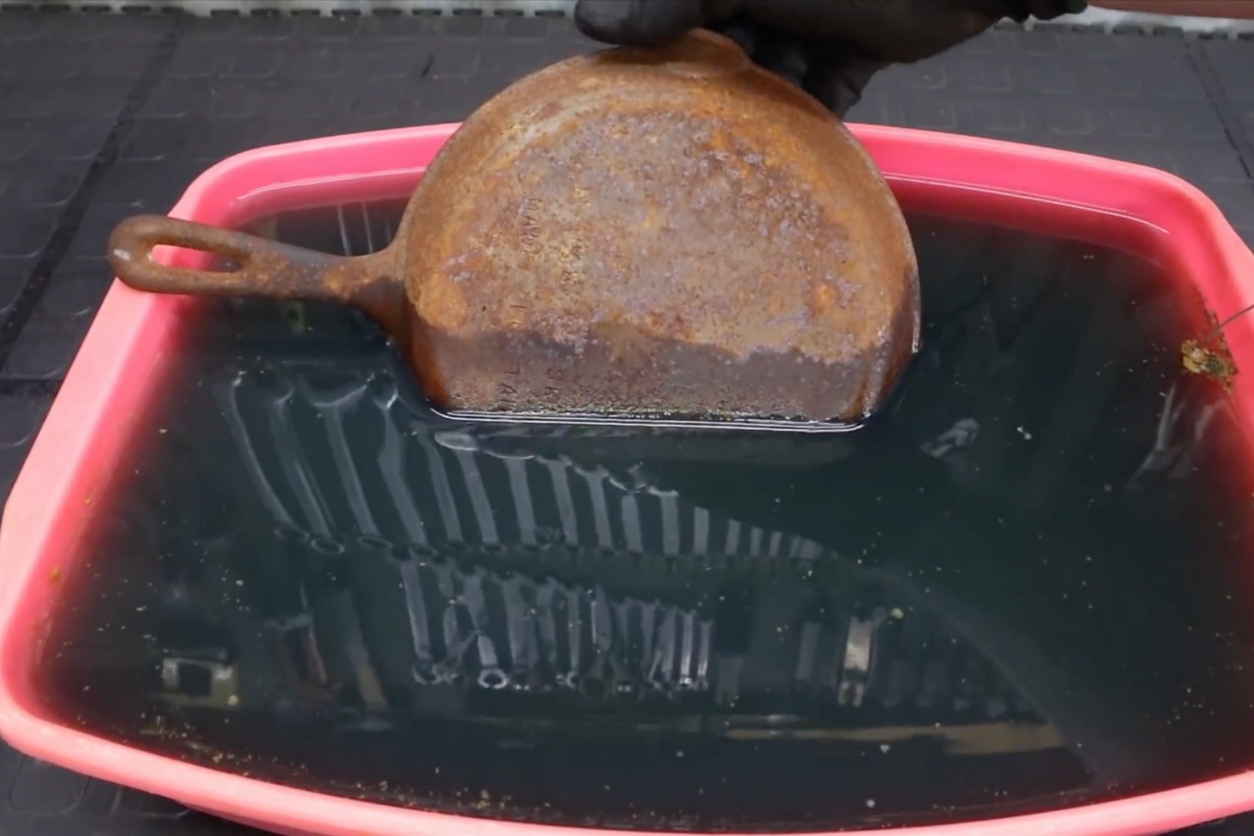
Step 1: Preparing the Vinegar Bath
The first step in using vinegar for rust removal is to soak the rusted item in a container filled with white vinegar.
Pick a non-reactive container, such as a glass or plastic tub, large enough to fully submerge the item.
Pour enough vinegar to completely cover the object. Since vinegar works best when it has full contact with the rust, you want to ensure that every rusted surface is submerged. There’s no need to dilute it—use straight vinegar for the best results.
Step 2: Soaking Time
The amount of time the item needs to soak depends on how much rust is present.
For light rust, soaking for a few hours might be sufficient to dissolve the rust. For more stubborn rust, you’ll need to let the item sit for at least 12-24 hours. White vinegar works slowly but effectively, and letting it do its thing overnight can make a significant difference, especially for heavily rusted tools.
Step 3: Scrubbing Away the Rust
After soaking, you’ll notice the rust loosening from the metal. At this stage, it’s time to remove the item from the vinegar and scrub off any remaining rust.
Depending on the object, a simple scrub with a toothbrush or some steel wool should be enough to get rid of the lingering rust. Be gentle if you’re working on a delicate item to avoid scratching the surface.
If the rust doesn’t come off easily, put the item back in the vinegar for a little longer. Sometimes, a second soak is needed for stubborn rust patches.
Step 4: Neutralizing the Acid
Once you’ve scrubbed off all the rust, it’s essential to neutralize the acid left on the item.
Create a solution of water and baking soda (about 1 tablespoon of baking soda per cup of water) and rinse the item thoroughly in it. This neutralizes the vinegar’s acidity and prevents it from continuing to eat away at the metal, which can cause damage if left unchecked.
Make sure the item is completely dry after rinsing, as moisture left behind can lead to the metal rusting again.
Baking Soda
If you’re looking for a gentle yet surprisingly effective rust removal method, baking soda can do the trick. It’s a household staple with mild abrasiveness, making it safe for a variety of surfaces that might be damaged by harsher chemicals or scrubbing methods. This makes baking soda a great option for items that need a little extra care during cleaning. Here’s how to make the most of it.
View this post on Instagram
Step 1: Making the Baking Soda Paste
The key to using baking soda for rust removal is creating a thick paste.
Combine baking soda with water in a small bowl. Aim for a 3:1 ratio, meaning three parts baking soda to one part water. You want a paste that’s thick enough to stick to the rusted surface without running. Mix well to avoid clumps, ensuring a smooth application.
Step 2: Apply and Wait
Once your paste is ready, you can apply it directly to the rusted area.
Spread the paste generously over the rusted surface using a sponge or even your fingers. Be sure to cover the rust entirely so the baking soda has direct contact with the problem spots.
Give the paste at least 30 minutes to an hour to work its magic. This resting time allows the mildly abrasive nature of the baking soda to lift the rust from the metal without requiring heavy scrubbing.
Step 3: Scrubbing and Rinsing
After the paste has had time to set, it’s time to remove the rust.
Use a soft brush or steel wool to scrub the rusted areas. For more delicate items, a toothbrush can provide just the right amount of pressure without causing damage. Work in small circles, gently lifting the rust away from the surface.
Rinse thoroughly under warm water to remove any remaining paste and rust debris. This step ensures that the baking soda doesn’t leave any residue that could affect the metal later.
Lemon Juice and Salt
If you’re seeking an all-natural, eco-friendly solution, lemon juice and salt can be your go-to combination for rust removal. The acidity in lemon juice breaks down rust, while salt acts as a mild abrasive. This combo is particularly effective on smaller items or lighter rust issues. Plus, it leaves a fresh citrusy smell behind—no harsh chemical odors.
Step 1: Creating the Mixture
You’ll need two basic ingredients: fresh lemon juice and coarse salt.
Sprinkle a generous amount of salt over the rusted surface. The salt helps to break up the rust and provides a bit of abrasion to aid in removal.
Squeeze fresh lemon juice directly onto the salt-covered area. Make sure the salt is fully soaked with the juice, but don’t overdo it. You want just enough to create a paste-like consistency.
Step 2: Let It Sit
After you’ve applied the lemon juice and salt mixture, it’s important to give it time to work.
Allow it to rest for at least an hour. The acidity from the lemon juice needs time to break down the rust, and the salt will act as a scrubber once you begin cleaning.
For tougher rust, you might want to let it sit longer—up to a couple of hours. Just be mindful of not letting the mixture sit too long, especially on delicate metal surfaces, as the acid could potentially cause damage if left unchecked.
Step 3: Scrubbing and Cleaning
Once the solution has had time to penetrate the rust, it’s time to scrub.
Gently rub the rusted area with a sponge, cloth, or even a soft-bristle brush to remove the rust. The salt will help scrub away the corrosion, while the lemon juice lifts it from the surface.
Rinse thoroughly to remove all traces of lemon juice and salt. Afterward, dry the item completely to prevent any lingering moisture from causing rust to return.
Decades of Combined Expertise
Best Buy Guidebook is a culmination of online publishing lessons learned. From SEO to paid ads, our team has experienced the highest of highs and the lowest of lows. Our goal now is simple: Arm readers with the most information possible.