How To Make a Cardboard DIY Advent Calendar

There’s something magical about the anticipation that builds as you count down to Christmas. Whether you’re six years old and dreaming about presents under the tree or an adult soaking up the season’s cozy charm, marking the days makes the wait all the sweeter. And what better way to do that than with a DIY advent calendar? It’s creative and personal and doesn’t come with the price tag of those fancy store-bought versions. Plus, there’s a sense of pride when you see something you’ve made yourself hanging on your wall or perched on a mantle.
This project isn’t just about saving money—it’s about creating something with a bit of heart. Maybe it’s for your kids, so they have something fun to look forward to every morning. Or maybe it’s for you, a little dose of cheer to brighten up December. Whatever the reason, crafting your own advent calendar lets you tailor every detail to your taste. And if you’ve got some old cardboard boxes lying around and a few craft supplies, you’re already halfway there.
Making the Houses
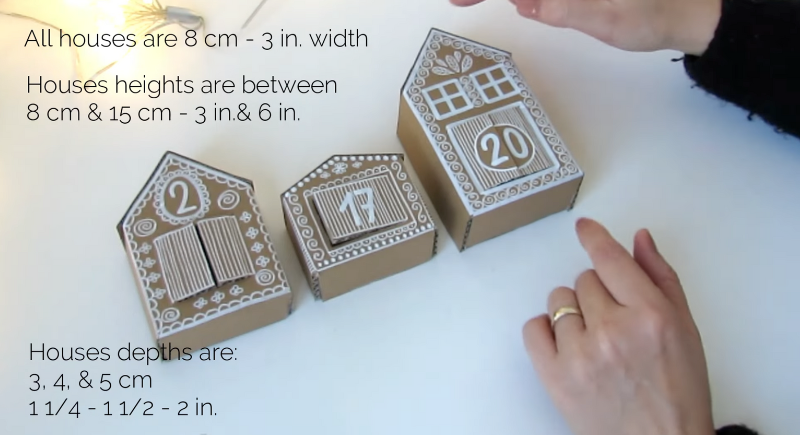
The first step is all about turning humble cardboard into tiny houses. You’ll need flat pieces of cardboard, so grab some boxes you’ve been meaning to recycle. Start by drawing a simple house shape—think a rectangle with a pointy roof—about 8 cm wide and 12 cm tall. Use a pencil for this; it’s forgiving if you need to tweak anything. Once you’ve got your house shape, add three flaps around the sides and bottom, each about 3 cm wide. These will help you fold the house into its 3D shape later.
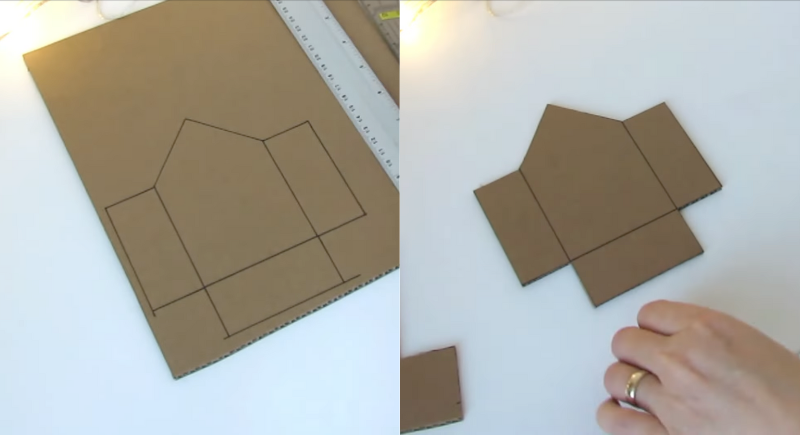
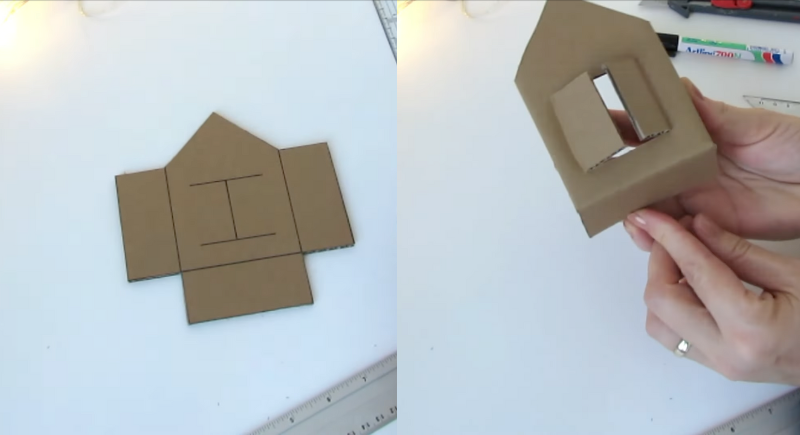
Cut out the shape using a craft knife and a ruler to keep the lines clean. If you’ve never worked with cardboard like this, here’s a quick tip: don’t press too hard with the knife. A couple of light passes are better than trying to slice through in one go. Once your house is cut out, mark fold lines along the edges of the flaps and the shutters for the door or windows. A gentle cut with your knife—just enough to weaken the material—will make folding easier.
Folding and Decorating
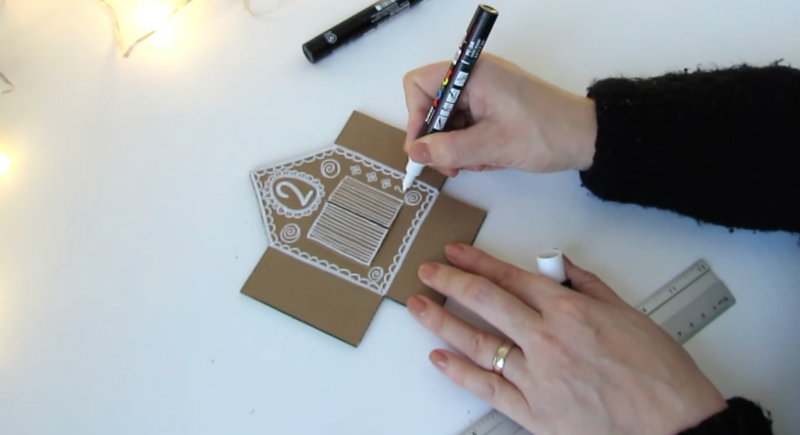
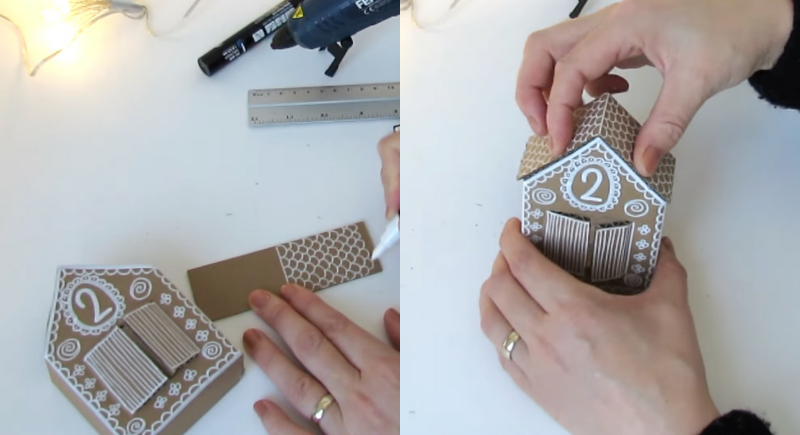
Before you assemble the house, take a moment to decorate it. This is where the fun starts. Use paint markers, colored pencils, or whatever craft supplies you have on hand to add numbers, patterns, and festive touches. You can go simple or elaborate, depending on your style. Maybe one house has a classic red and green palette, while another gets a snowy blue and white theme. Let your imagination run wild.
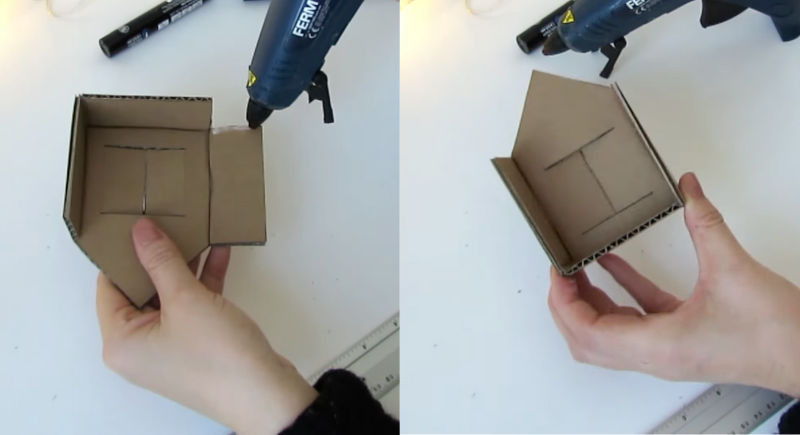
Once the decorating is done, fold the house along the marked lines. Apply glue to the flaps and hold them in place until the glue sets. Hot glue works well for this since it dries quickly, but regular white glue will do the trick if you’re patient. Repeat the process for all 24 houses. It might sound like a lot, but trust me, the rhythm of cutting, folding, and gluing becomes almost meditative.
Adding the Roofs
Each house needs a roof, and this step is as straightforward as the rest. Measure the width of your house (it should be around 8 cm) and cut a rectangle of cardboard slightly longer than double that width to create a peaked roof. Lightly score the center of the rectangle to make it easier to fold. Decorate the roof with paint or markers, then glue it on top of the house.
Feel free to mix up the roof designs—some might have flat tops, while others get a steeper pitch. Adding variety here makes the overall calendar more dynamic and interesting.

Building the Backdrop
Now that your houses are ready, it’s time to create a sturdy base to hold them all. You’ll need two large pieces of cardboard, about 100×40 cm (roughly 40×16 inches). To make the backdrop extra strong, glue the two pieces together. A little trick here: if you want to get fancy, cut the top edge of the cardboard into mountain-like peaks. It’s a small detail, but it adds a lot of charm.
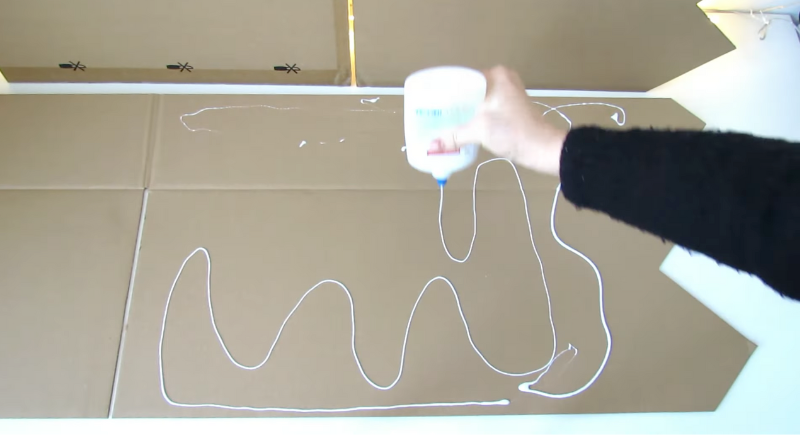
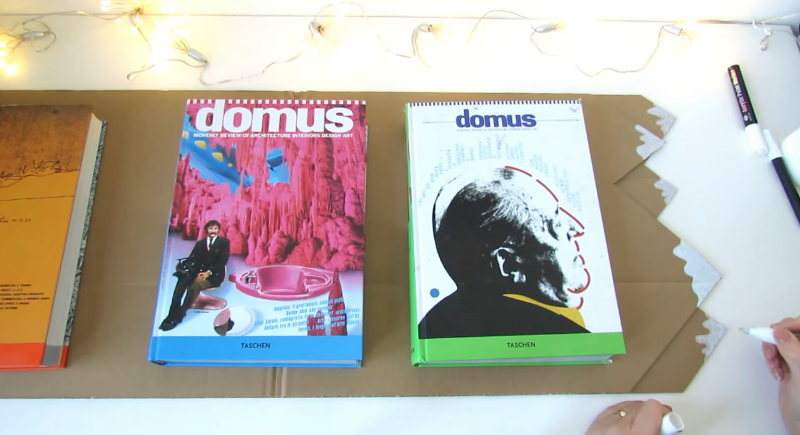
Once the glue dries, decorate the backdrop however you like. Paint snowy tips on the mountains, draw some stars, or keep it simple with a clean, neutral background. Place heavy books on top of the glued layers while they dry to ensure everything stays flat and secure.
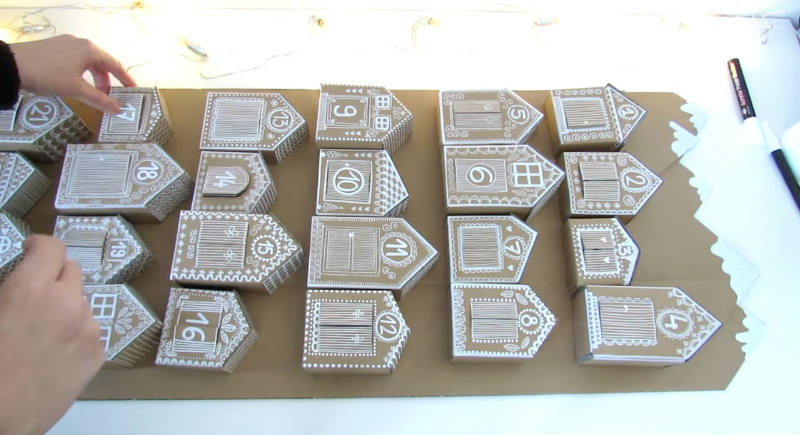
Arranging and Gluing the Houses
With your backdrop complete, lay out the 24 houses in rows—six rows of four houses each works well. Play around with the arrangement until you’re happy with how it looks. Maybe the smallest houses go at the top for a pyramid-like effect, or you alternate colors and sizes to create visual interest.
Once you’re satisfied, glue each house onto the backdrop. Apply glue to the back of the house and press it firmly onto the board. Hold it in place for a few seconds while the glue sets. Continue until all the houses are attached.
Filling the Calendar
Here’s where this DIY advent calendar becomes truly personal. Fill each little house with treats, trinkets, or notes. You could go with classic options like chocolates and candies or mix it up with small toys, stickers, or handwritten messages. If you’re making this for yourself or another adult, tiny bottles of essential oils, rolled-up affirmations, or even mini holiday recipes could be fun surprises.
Displaying Your Calendar
Your finished advent calendar deserves a place of honor. Prop it on a shelf, hang it on a wall, or lean it against your mantle with the rest of the Christmas decor. Wherever it ends up, it’s sure to bring a little extra joy to your holiday season. And the best part? Every time you or your family opens one of those tiny houses, you’ll get a little reminder of the love and care that went into creating it.
Decades of Combined Expertise
Best Buy Guidebook is a culmination of online publishing lessons learned. From SEO to paid ads, our team has experienced the highest of highs and the lowest of lows. Our goal now is simple: Arm readers with the most information possible.